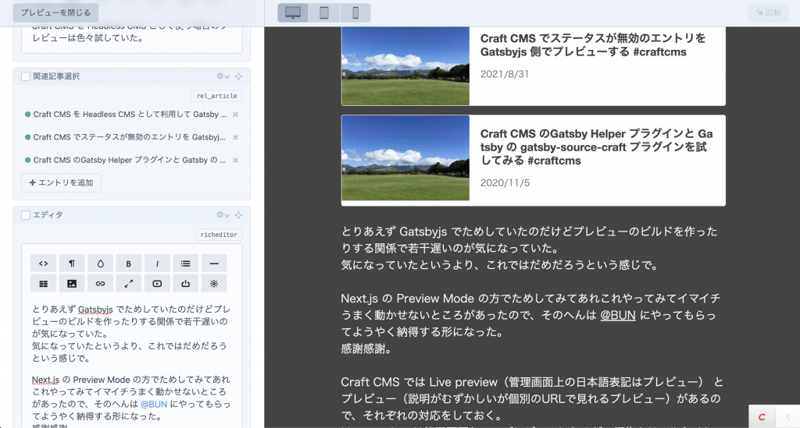
Craft CMS を Headless CMS として利用して Next.js でコンテンツをプレビューする #craftcms
Craft CMS を Headless CMS として使う場合のプレビューは色々試していた。
とりあえず Gatsbyjs でためしていたのだけどプレビューのビルドを作ったりする関係で若干遅いのが気になっていた。
気になっていたというより、これではだめだろうという感じで。
Next.js の Preview Mode の方でためしてみてあれこれやってみてイマイチうまく動かせないところがあったので、そのへんは @BUN にやってもらってようやく納得する形になった。
素晴らしー!感謝感謝。
Craft CMS では管理画面での Live preview(管理画面上の日本語表記はプレビュー) とプレビュー(説明がむずかしいが個別のURLで見れるプレビュー)があるので、それぞれの対応をしておく。
Live preview は管理画面内でのプレビューで、編集をリアルタイムで確認できる。
プレビューの方は、外部の人にも見てもらえるようなプレビューと考えると良さそう。
Craft CMS 側の設定
Craft CMS 側の GraphQL の設定として、有効なスキーマの設定と、それに対応するトークンの設定は完了してある状態。

config/general.php に Headless mode の設定。
'headlessMode' => true,General Config Settings | Craft CMS Documentation | 3.x
https://craftcms.com/docs/3.x/…
config/roots.php にGraphQL用のルーティングの設定も。
return [
    'api' => 'graphql/api',
    // ...
];
GraphQL API | Craft CMS Documentation | 3.x
https://craftcms.com/docs/3.x/…
.env の設定
.env にエンドポイントとトークンの設定をしておく。
CMS_ENDPOINT=https://example.com/api
AUTH_BEARER_CODE=hogehogehoge
next.config.js の設定
next.config.js にエンドポイント周りの設定を入れておく
module.exports = {
  reactStrictMode: true,
  env: {
    CMS_ENDPOINT: process.env.CMS_ENDPOINT,
    AUTH_BEARER_CODE: `Bearer ${process.env.AUTH_BEARER_CODE}`
  }
必要なパッケージのインストール
必要なパッケージは @apollo/client, graphql あたりなので、これらをインストールしておく。
Query
GraphQL 用の Query を用意する。
gql/entries.js
公開されている全エントリ取得用の gql/entries.js 。
import { gql } from '@apollo/client'

// 全エントリデータ取得用クエリ
export const ENTRIES_DATA = gql`
  query ($sectionHandle: [String]) {
    entries(section: $sectionHandle, status: "live", limit: null){
      id
      title
      slug
      uid
      sourceUid
      canonicalUid
      sectionHandle
    }
  }
`;
limit も variable で渡してもいいかもしれないし、そのへんは使い方にあわせて要調整。
gql/entry.js
単一のエントリを取得するところ。ステータスがちがうのでpreview用と公開用で別に。
import { gql } from '@apollo/client'

// エントリデータ取得用クエリ:プレビュー用
export const ENTRY_PREVIEW_DATA = gql`
  query ($sectionHandle: [String!], $uid: [String]) {
    entry(section: $sectionHandle, uid: $uid, status: null, drafts: null) {
      id
      title
      slug
      status
      draftId
      uid
      sourceUid
      canonicalUid
      postDate
      sectionHandle
      ... on news_news_Entry {
        id
        text_kana
        redactor
      }
    }
  }
`;

// エントリデータ取得用クエリ:公開データのみ
export const ENTRY_DATA = gql`
  query ($sectionHandle: [String!], $id: [QueryArgument]) {
    entry(section: $sectionHandle, id: $id, status: "live") {
      id
      title
      slug
      status
      draftId
      uid
      sourceUid
      canonicalUid
      postDate
      sectionHandle
      ... on news_news_Entry {
        id
        text_kana
        redactor
      }
    }
  }
`;
canonicalUid はちょうど3.7.11で追加されたもの。
https://github.com/craftcms/cm…
この辺の sourceUid と Uid とかも正確に把握し切れていないところがあるが、、
status null ですべてのステータスがとれるというのを教えてもらった。
Apolloの設定
config/apollo.js の設定
import { ApolloClient, createHttpLink, InMemoryCache } from '@apollo/client';
import { setContext } from '@apollo/client/link/context';

async function apollo(gqlQuery, gqlParams, previewToken = false) {
  // set GraphQL URI
  const httpLink = createHttpLink({
    uri: previewToken ?
      process.env.CMS_ENDPOINT + '?token=' + previewToken :
      process.env.CMS_ENDPOINT
  });

  // set Authorization header
  const authLink = setContext((_, { headers }) => {
    return {
      headers: {
        ...headers,
        authorization: process.env.AUTH_BEARER_CODE,
      }
    }
  });

  // Apollo Client initialization
  const client = new ApolloClient({
    link: authLink.concat(httpLink),
    cache: new InMemoryCache()
  });

  // execute GraphQL query
  return await client.query({
    // the GQL query
    query: gqlQuery,
    // pass through query params e.g. { slug: "boop", uid: "2dff-344d-dfdd...", token: "..." }
    variables: gqlParams,
    // display errors from GraphQL (useful for debugging)
    errorPolicy: 'all'
  }).then(data => {
    return {
      // return the data or NULL if no data is returned
      data: (typeof(data.data) != "undefined") ? data.data : null ,
      // return any errors
      errors: (data.errors) ? data.errors : []
    }
  });
}

export { apollo }
サイトトップ
pages/index.js の設定。
どのセクションのデータを取り出すかを渡す。この場合は news セクション。
プレビューの確認としてはいらないけど、表示側の確認用もかねて用意する。
import { apollo } from '@/config/apollo'
import { ENTRIES_DATA } from '@/gql/entries';

// 静的生成のためのコンテンツデータの取得
export async function getStaticProps() {
  var { data, errors } = await apollo(
    ENTRIES_DATA,
    {
      sectionHandle: 'news'
    }
  );

  return {
    props: {
      entries: data.entries
    },
  };
}

// ページの出力
export default function Index({ entries }) {
  return (
    <div>
     〜〜略〜〜
    </div>
  )
}
詳細ページ
詳細ページ用 /pages/news/[id].js の調整。
id からエントリを探す。
import { apollo } from '@/config/apollo'
import { ENTRY_DATA } from '@/gql/entry';
import { ENTRIES_DATA } from '@/gql/entries';

// 静的生成のためのコンテンツデータの取得
export async function getStaticProps(context) {
  // エントリを取得
  var { data, errors } = await apollo(
    ENTRY_DATA,
    {
      id: context.params.id
    },
    null
  );

  // 公開エントリが見つからなければ、404 表示
  if (errors.length > 0 || !data.entry) return { notFound: true }

  // エントリ、および、プレビューデータを返却
  return {
    props: {
      entry: data.entry
    }
  }
}

// 静的生成のためのパスを指定
export async function getStaticPaths() {
  var { data, errors } = await apollo(
    ENTRIES_DATA,
    {
      sectionHandle: 'news'
    },
    null
  );

  // 出力対象のエントリのパスをセット
  const paths = data.entries.map((entry) => `/news/${entry.id}`);

  // セットしたパス以外は 404
  return { paths, fallback: false };
}


// ページの出力
export default function Detail({ entry }) {
  return (
    <div>
〜〜略〜〜
    </div>
  )
}
Preview用の詳細ページ
Preview Mode でリダイレクトするプレビュー用も別 pages/news/preview.js で用意しておく
import { apollo } from '@/config/apollo'
import { ENTRY_PREVIEW_DATA } from '@/gql/entry';

// 静的生成のためのコンテンツデータの取得
export async function getStaticProps(context) {
  if (context.preview && context.previewData.token) {
    // Preview Mode なら、uid と token をセットしてエントリを取得
    var { data, errors } = await apollo(
      ENTRY_PREVIEW_DATA,
      {
        uid: context.previewData.uid
      },
      context.previewData.token
    );

    // ページが見つからなければ、404 表示
    if (errors.length > 0 || !data.entry) return { notFound: true }
  } else {
    // Preview Mode でなければ、404 表示
    return { notFound: true }
  }

  // エントリ、および、プレビューデータを返却
  return {
    props: {
      entry: data.entry,
      preview: context.preview ? context.previewData : []
    }
  }
}

// ページの出力
export default function Preview({ entry }) {
  return (
    <div>
〜〜略〜〜
    </div>
  )
}
API設定
/pages/api/preview.js でプレビューモード部分の api 設定をする
import { apollo } from '@/config/apollo'
import { ENTRY_PREVIEW_DATA } from '@/gql/entry';

export default async (req, res) => {
    // URL パラメータに token と canonicalUid がセットされていなければ、401 表示
    if (!req.query.token || !req.query.canonicalUid) {
      return res.status(401).json({ message: 'Invalid preview request' });
    }

    // URL パラメータの canonicalUid を uid に持つエントリを取得
    const entry = await apollo(ENTRY_PREVIEW_DATA, {
      uid: req.query.canonicalUid,
      sectionHandle: 'news'
    });

    // Preview Mode で表示可能なエントリがなければ、404 表示
    if (!entry) {
      return res.status(404).json({ message: 'Page not found' });
    }

    // プレビュー用の uid と token を cookie にセット
    res.setPreviewData({
      uid: req.query.canonicalUid,
      token: req.query.token
    });

    // Live Preview の iframe 表示に対応させるため cookie を調整
    const previous = res.getHeader('Set-Cookie');
    previous.forEach((cookie, index) => {
      previous[index] = cookie.replace('SameSite=Lax', 'SameSite=None;Secure');
    })
    res.setHeader(`Set-Cookie`, previous);

    // 任意の条件によって、リダイレクト先を分岐
    if (entry.data.entry.sectionHandle == 'sitetop') {
      // トップページ
      res.redirect('/preview?uid=' + entry.data.entry.canonicalUid + '&token=' + req.query.token);
    } else {
      // それ以外
      res.redirect('/' + entry.data.entry.sectionHandle + '/preview?uid=' + entry.data.entry.canonicalUid + '&token=' + req.query.token);
    }
}
こんな感じで各テンプレートを用意することで、記事のステータス、下書き等にかかわらずライブプレビューができる!
リダイレクトの所は、今回の場合は /news/preview?uid=xxx にリダイレクトさせて内容を取得する。
cookie を渡さないとライブプレビューが動かないので、そこも注意する。
Next.js Preview in iframes - Storyblok
https://www.storyblok.com/faq/…
Storyblok のエントリが参考になった。
ライブプレビューの様子。
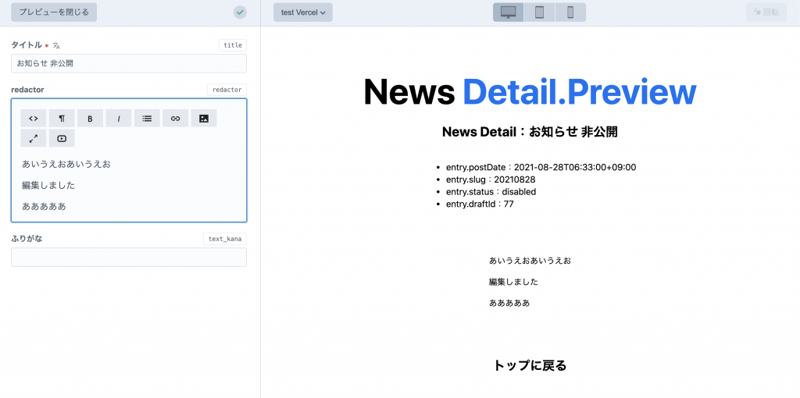
コンテンツを編集すれば、ライブプレビューの内容に反映される。
プレビュー。
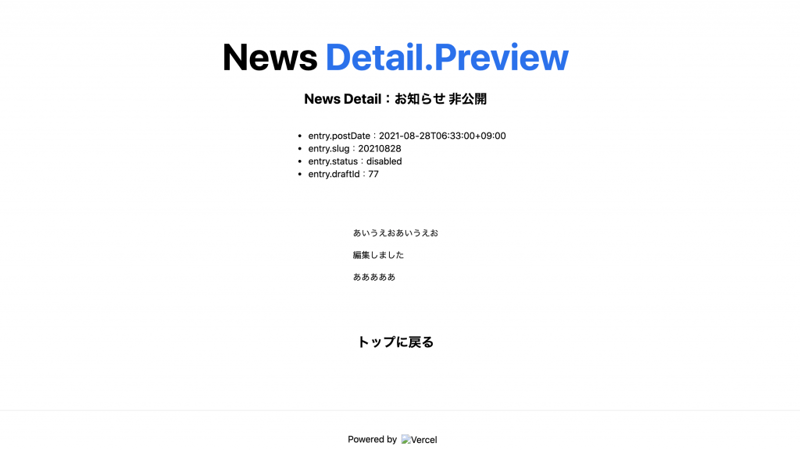
Vercel に置いて確認してみたけど、ページとしてプレビューも確認できる。
あとはどこかで cookie 消す処理を入れておくと良さそう。
Craft CMS で Live Preview を試した記事とか、他の Headless CMS でプレビューを試しているエントリが以下のものだけじゃなく色々と参考になった。
参考リンク
- Live preview with Craft CMS & Next.js - DEV Community
https://dev.to/mylesthedev/liv… - Craft CMS Live Preview with Next.js 9.3 Static Site Generation and GraphQL - DEV Community
https://dev.to/zauni/craft-cms… - Using Craft CMS Live Preview with Next.js - Mutual
https://www.mutual.agency/blog… - Advanced Features: Preview Mode | Next.js
https://nextjs.org/docs/advanc… - Next.jsのPreview Mode+Vercelでプレビュー機能を実現する | microCMSブログ
https://blog.microcms.io/nextj…